A firewall is essential when it comes to preventing malicious software and hackers from gaining access to your computer. With Windows 7, you can actually fine-tune your firewall settings to match your daily usage while still keep your computer well protected. To access the advanced settings and help you get started right away, follow these next few steps.
First of all, you need to disable your Windows firewall to gain access to recommended settings. To do this, go to Control Panel> System and Security > Windows Firewall and then click on the “Change notification settings” link on the left panel. Disable both private and public network firewall and click apply to continue. At the Windows Firewall control panel page you see after clicking OK, you will notice a new button labeled “Use recommended settings” — this is what we are after — so go ahead and click the button.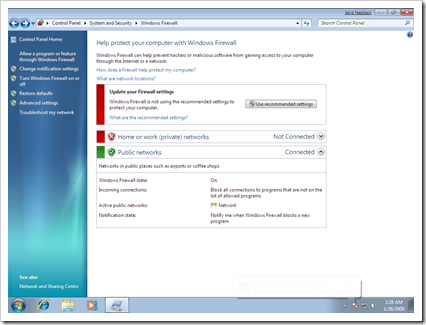
A popup will ask for your confirmation, and you can safely click Yes to continue. Windows will analyze your current computer state, along with installed applications, and determine the right firewall settings for your computer. After the process is completed, you can continue with fine-tuning the firewall settings to suit your needs.
To access the advanced settings for Windows 7’s firewall, click “Advanced Settings” on the left panel of the Windows Firewall control panel page. You will see a new page with Inbound Rules, Outbound Rules, Connection Security Rules, and Monitoring links on the left panel. You can disable available rules or create new ones — for Inbound and Outbound Rules, this is essentially important and allows you to set the firewall to work according to your needs — and manage monitoring preferences from here.

 Ankur Jain is a Software Engineer in Test Automation. After a 5 years stint with Accenture and Oracle, he started his eLearning company. A long-time blogger and proud owner of the "Learn" series of websites.