PayPal gives an option for its Premier/Business account holders to customize payment pages. Using customization one can replace the email id displayed on top of payment pages with the company/website logo. This can make the whole look-and-feel more professional.
How can you customize PayPal Payment pages?
This step really took me a long time. I wish PayPal makes its search more user friendly. The keyword system of search simply doesn’t work inside PayPal. And as always my favorite DP forums came to rescue.
Coming to the point, here is a step by step guide to create your own PayPal custom payment pages:
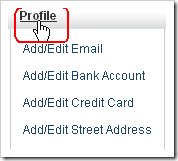
- Log into PayPal account > Click on ‘Profile’.
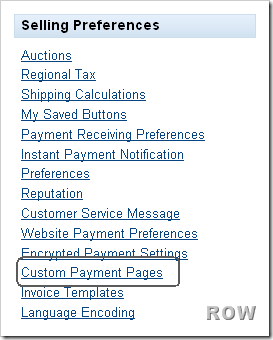
- On the right hand side, you will find ‘Selling Preferences’ box. Click on ‘Custom Payment Pages’ link.
- The next page is ‘custom payment page styles’. From this page, you can Add, Edit, Preview, and Remove page styles, as well as make any page style your Primary style. By default ‘PayPal’ page style is the primary style. You may add up to 3 page styles. To add a page style click on ‘Add’ button.
- On the next page, you can fill your custom settings. Give a unique name to the ‘Page Style Name’ box. The next edit box asks for the ‘Header image URL’. This is the most tricky part, in the next point you will understand why.
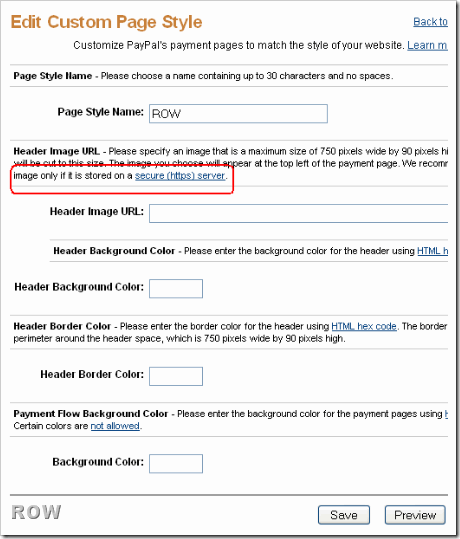
- Now you need to give the Header Image URL. For the header image, PayPal allows you to specify an image 750 px wide and 90 px height, that is reasonable by any standards. Problem occurs with their recommendation of asking us to store header image only on secure (https) server. Though you can store image on http: server also, but it will give a warning to your users that the payment page contains insecure items. That is as good as not having the image altogether. Unless you are a reasonable size company, I don’t think you would be having a https server. [If you have, that’s good. You can safely skip this point]. So where can we find a free https server (also known as SSL server)? A quick search on SSL Image Hosting will throw up a lot of free and paid choices. I prefer SSLPic, firstly because they have a no-nonsense interface which doesn’t require you to create a user account and secondly because it is from the reliable e-junkie . It also provides you with the stats regarding how many times people have clicked on your ‘Buy-Now’ buttons.
- Once you get the URL, place it inside the ‘Header Image URL’ box. Fill in the header background color, header border color and background color. I prefer having the header colors same as my logo. If you find difficulty in getting the exact hex code of your header, try Instant Eye Dropper
- Save the button.
- Now you have two option, either make this style as a default primary style or leave it as it is. If you choose to make it as primary, all your button payment pages will get default settings as you have defined above. On the other hand, if your PayPal account is used for more than one businesses, you may want to leave it as it is and choose the settings on button by button basis.
- Now how can you associate your button with the style name ROW defined above? Go to ‘Edit your PayPal Payment button’, head over to Step 3. On the bottom of this step you will find a box labeled Advanced Variables (power users). Check the ‘Add advanced variables’ option and fill in page_style=<Your Style Name> as also shown in the image below. Save the button.
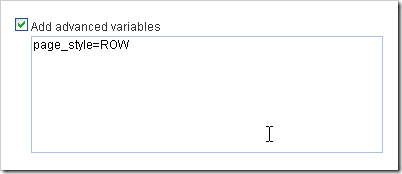
- Clink on your PayPal button. You should be able to see the new header style for your PayPal payment page.
Enjoy!
Related: Tips every PayPal user should know

 Ankur Jain is a Software Engineer in Test Automation. After a 5 years stint with Accenture and Oracle, he started his eLearning company. A long-time blogger and proud owner of the "Learn" series of websites.
I would like to know is it here that a comment box will be left before checkout to allow the customer to leave pertinent information to the seller…like if they would like to have an item resized and what length?
Thanks for this primer. Somewhat incredibly, Paypal’s own instructions are inaccurate – since the documentation refers to options that are not in fact presented, then mentions modification of the button HTML, but implies that the alterations need to take place in the form HTML, and never mentions the Add Advanced Variables box. It would have been a guess for me to try something like what you’ve supplied here. It’s still not clear to me how to choose between “classic” and “enhanced” versions of the new payment page, but it defaulted to the one I wanted, so I’ll leave it at that for now.
Glad it helped!
Hey Ankur,
I looked for a while on how to make custom paypal pages and I can’t believe I finally found it here (PayPal is definitely not known for great web usability after all).
Anyway, I’ll try to do this tomorrow in FULL since it’s already too late for me but thanks in advance as I think I had already bumped into this post at another time before.
Sergio
this was an excellent
I have a question. I have a mall where other people can sign up and sell stuff for 5% of sales. Its free to join and free to list. The top of the paypal page displays my company name which is good but I need the name in the place that displays the price to be the name of the company that the customer is buying products from. Can you help me?
Dear ROW
When a customer clicks on Paypal Button and when it redirects to paypal page, it is showing as below with Business Name
PayPal securely processes payments for BUSINESS NAME,
Instead of BUSINESS NAME, i would like to make it display with EMAIL ID as below
PayPal securely processes payments for EMAIL ID
ofcourse after logging let it display BUSINESS NAME, but during redirect page i would need like above, Please let me know the steps on this, i tried, but i didn’t get it
Thank you. It was well written and helpful. Good job!
I am extremely impressed with your writing skills and also with the layout on your blog. Is this a paid theme or did you customize it yourself? Either way keep up the nice quality writing, it’s rare to see a nice blog like this one these days.. 🙂
I would like to know, one my client online payment to Paypal account. Now, How I can check the
Payment that I recieve in my Paypal account ?
Great post. I just setup my first custom paypal payment page thanks to your info.
Aaron
yes this was an excellent post and saved me countless headaches too, thanks or the VALUABLE help, cheers
Hi there,
Thanks so much for this post- I swear it has saved me literally hours and hours. So simple and easy to use and I was most excited when it all worked the first time.. cheers sam
Glad it worked for you.
Is it possible to hide your physical address when someone uses PayPal donate? I’d rather someone donating to my website not be able to see my home address.
@Travis: Yes in case you use premier/business PayPal account, you can hide your physical address.
Hey Row,
Thanks for your response. OK so you don’t know about how to hide email address. Never Mind. Do you by chance know how to add your own text under the image(NOT ON THE IMAGE)
Just like say this is an
image—this is an image
some personal text –below the image
Thanks for your help.
Hi,
First of all i would like to thank you for this so wonderfully explained each and every step. I was struggling for this since morning. I got the answer more or less 95%
Can you please explain Now after your 9 or 10 steps i see this
PayPal securely processes payments for [email protected]. (Ofcourse i see my image on top)
I don’t want that my email address is displayed. How can i hide when i want to and unhide when i want to.
Thanks once again.
Moon
Glad you liked it Moon.
Regarding your query, I didn’t find any option to hide/unhide the email id. You can change it to your business name if you have a business account.